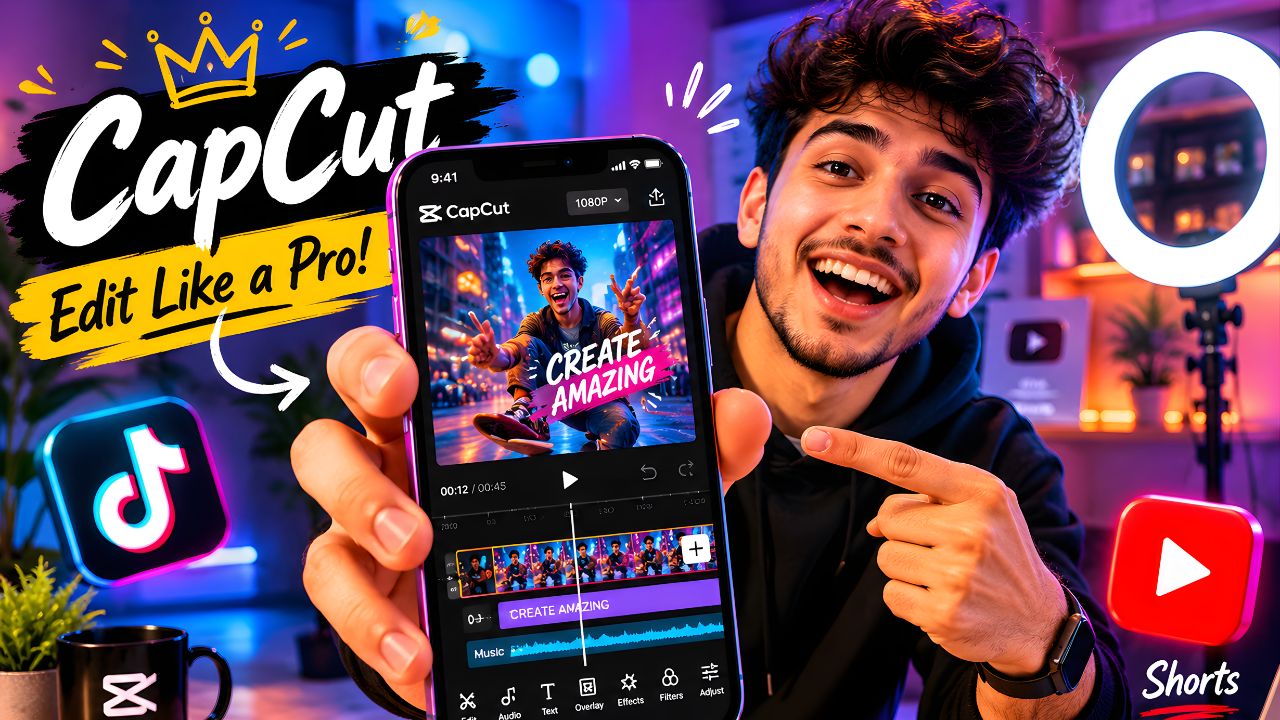
A friend of mine a personal trainer with zero video editing background posted her first TikTok in January 2026. She used CapCut, a trending template, auto-captions, and about 40 minutes of her Sunday afternoon. The video hit 380,000 views in 72 hours. She called me asking what she did right. Honestly? She just used the right tool and didn’t overthink it.
That’s the whole story with CapCut. It’s not magic. But it’s genuinely the fastest path from a raw clip on your phone to something that looks intentional, polished, and platform-native — and in 2026, the AI features have gotten good enough that the gap between a beginner and a decent editor is smaller than it’s ever been.
This guide is going to walk you through the features that actually matter, the ones that are honestly just gimmicks, and the specific workflow I use to put together Shorts and TikToks that don’t look like they were made in a hurry.
Why CapCut Dominates and Why That’s Actually Earned
CapCut now has 500 million users and is built by ByteDance the same parent company as TikTok. That’s not a coincidence. The app is engineered specifically around the short-form content workflow. It’s not trying to compete with DaVinci Resolve or Premiere Pro. It’s trying to be the fastest path from “raw clip on your phone” to “published Reel or TikTok” — and it wins that race every time.
In my experience, the thing that separates CapCut from every other mobile editor isn’t any single feature. It’s that every decision in the interface was made by someone who actually watches TikTok. The aspect ratios are right. The default export settings are right. The templates match what’s currently trending. That context-awareness is built in, and you feel it immediately.
Setting Up Your First Project the Right Way
Open CapCut, tap the + button, and import your clips. Simple enough. But here’s the thing nobody tells you when they’re just starting out — how you import matters.
Don’t dump every clip into one project and start trimming from scratch. Instead, do a rough cull in your phone’s gallery first. Keep only the clips where the lighting is decent, your audio is clear, and something actually happens in the first two seconds. CapCut’s timeline gets messy fast, and starting clean saves you twenty minutes of frustration later.
Once you’re in the timeline, your first move should be trimming dead air from the start and end of every clip. TikTok’s algorithm rewards watch time, and if your video opens with two seconds of you fumbling with the camera, you’ve already lost half your audience before you’ve said anything.
The AI Features Worth Your Time in 2026
CapCut’s 2026 AI toolkit includes instant captions in 130+ languages, AI avatars for faceless videos, and text-to-speech with 269 voices, alongside automatic silence removal, smart background music, and smooth transitions. That’s a lot. But not all of it is equally useful. Let me break down the ones that genuinely change how fast you can work.
Auto-Captions: Use This Every Single Time
If you only use one AI feature in CapCut, make it auto-captions. The tool transcribes spoken audio and places styled subtitles on your timeline in seconds — for a 10-minute video, the process takes roughly 15 to 20 seconds. Accuracy sits around 94 to 96% for clear English speech, dropping to about 85% if you have a strong regional accent or background music competing with the voice track.
Before this existed, manually subtitling a 10-minute video took 30–45 minutes. Now it’s under 10 minutes including corrections. That time saving is real, and it compounds across every video you make.
The caption editor lets you adjust timing, split or merge blocks, and change styling. Free plan users are limited to 10 minutes of auto-captioned video per project; Pro and Team plans have unlimited auto-caption generation. For most short-form content, 10 minutes is plenty.
Pick a bold caption style — thick white text with a dark outline is still performing best on both TikTok and Shorts as of mid-2026. Don’t use thin serif fonts. Nobody can read them while scrolling.
AI Background Removal: Brilliant When It Works
CapCut’s AI Background Removal offers real-time green-screen-free background removal for video clips, working on people, pets, and solid objects. Edge detection quality is noticeably better than the 2025 version, though fine hair and transparent materials still cause artifacts.
For talking-head videos filmed against a relatively plain wall, it works brilliantly — clean edges, minimal flickering, and it handles hair surprisingly well. Where it struggles: complex backgrounds with similar colours to your subject, fast movement causing ghosting, and low-light footage under roughly 400 ISO.
So if you’re filming yourself in good lighting against a simple background, this feature is genuinely impressive. Film yourself in a cluttered kitchen wearing a green shirt near some plants and… you get the idea.
Smart Reframe: The Hidden Time-Saver
This one doesn’t get talked about enough. If you shoot horizontal video (16:9) and need a vertical (9:16) version for TikTok or Shorts, Smart Reframe automatically tracks your subject and adjusts the crop so they stay centered in frame. Auto Reframe for all aspect ratios is available on the Pro tier.
The free version handles basic reframing well enough for most talking-head content. For action content with fast movement across the frame, you’ll want to check it manually — the tracking occasionally makes strange decisions.
AI Auto-Edit: Promising But Not Ready to Trust Fully
CapCut’s AI Auto-Edit processes raw footage through scene recognition, speech transcription, and quality scoring before assembling a narrative with automatic color correction, audio leveling, and transitions.
I’d push back on anyone who says this feature is ready to replace a real edit. It’s useful as a starting point — like getting a rough cut you can then tear apart and reassemble. But the pacing decisions it makes are often wrong for short-form content, and the transition choices can feel generic. Use it to get 60% of the way there, then fix the rest manually.
How to Use Templates Without Looking Like Everyone Else
Here’s where most beginners go wrong. They open CapCut, browse templates, pick the most popular one, and drop their footage in. The result looks exactly like 40,000 other videos made the same week.
CapCut’s 2026 offerings include templates and tutorials built for the rapid engagement needs of TikTok, Instagram Reels, and YouTube Shorts. But the trick to using them well is to use templates that are trending upward, not ones that have already peaked.
Here’s what I actually do: I open the Templates tab and filter by “New” instead of “Popular.” I look for templates with 50,000–200,000 uses rather than 5 million. Those are the ones that are building momentum but haven’t been run into the ground yet. Your video gets the format recognition boost from the platform without being buried under a million identical clips.
Also — customize the font, change the color accent, and swap the music for something from CapCut’s trending audio list that week. Two minutes of changes make a templated video feel original.
The Workflow That Actually Gets Results
Let me walk you through the exact process I use for a 30–60 second TikTok or Short:
Step 1 — Trim first, everything else second. Get your clips down to only the usable sections before you touch any effects or captions.
Step 2 — Run Auto-Captions immediately. Do this before adding music, because the caption tool reads your audio. Background music interferes with transcription accuracy.
Step 3 — Add music and set the volume. Keep voiceover or talking-head audio at around 100% and music at 15–25%. Most creators mix music too loud and their captions become the only way to follow along — which is fine, but your audio should still be intelligible.
Step 4 — Color grade in 30 seconds. CapCut’s Filters tab has a “Film” category that adds a subtle warm grade to almost any footage and makes it look less phone-like. Apply it at around 40–50% strength. Don’t go full strength — it looks processed.
Step 5 — Check your hook. Watch the first three seconds with the sound off. If something visually interesting isn’t happening by second two, rearrange your clips. The silent scroll test doesn’t lie.
Step 6 — Export at 1080p, 60fps. Always. Close all other background apps before hitting export, and make sure Hardware Acceleration is turned on in Settings → Performance for faster rendering.
CapCut Free vs. Pro: Is $19.99/Month Worth It?
CapCut Pro costs $19.99 per month as of 2026 — a price that nearly doubled from its pre-2025 rate as ByteDance shifted to active monetization. The Pro tier unlocks the full AI feature suite including unlimited AI Auto-Edit, advanced AI Avatar generation, full background remover, Auto Reframe for all aspect ratios, access to the premium template library, and priority rendering.
Honestly? For most creators just starting out, the free tier is enough for 90% of what you’ll actually use. Auto-captions up to 10 minutes per project, background removal, basic templates, and 1080p export are all available free. The watermark on free exports was removed in 2024 — that’s no longer a reason to upgrade.
Upgrade to Pro if: you’re making videos professionally, you need unlimited caption length, you want the full template library, or you’re doing faceless content with AI avatars regularly.
Stay on free if: you’re a hobbyist, you’re just starting to build an audience, or you primarily make sub-5-minute content.
Who This App Is Actually For
CapCut works best for three types of people. Content creators making TikToks, Reels, or Shorts who need speed over precision. Small business owners who want to make product videos without hiring an editor (the templates alone make this feasible with zero experience). And educators or coaches who talk to camera and need clean captions quickly.
It’s not the right tool if you’re editing long-form YouTube content with complex multi-cam setups, or if you need color grading precision that matches professional broadcast standards. For that, you’d want DaVinci Resolve or even LumaFusion on mobile. CapCut knows what it is and doesn’t pretend otherwise.
One Thing People Get Wrong About Viral Videos
Going viral isn’t about perfect editing. My trainer friend didn’t go viral because her CapCut skills were exceptional. She went viral because she posted something specific, useful, and a little surprising — and the editing was just clean enough not to get in the way. CapCut doesn’t make content go viral. It removes the technical barrier so your actual idea can do the work.
Are you spending more time on the edit than on the idea itself? Because if so, that’s worth flipping around.
What’s Coming Next for CapCut
As of late May 2026, CapCut and Google have confirmed a partnership for Gemini integration, which would enable AI-assisted script generation, automatic caption creation, and automated editing workflows driven through conversational prompts — describing what you want in natural language and having CapCut execute it. No official launch date has been confirmed yet.
That’s genuinely exciting. Natural language editing — “trim this to 30 seconds, add bold captions, make the pacing faster in the second half” — would collapse the gap between idea and finished video even further.
So here’s what I want to know: what’s the one part of your video editing process that’s still taking you the longest right now — the caption styling, the color grading, finding the right music, something else? Drop it in the comments and I’ll tell you exactly which CapCut feature or workflow trick addresses it.